

How To Open Moto G Power Back Cover
Motorola Moto G Repair Guide
June 4, 2018 | 0 Comments

RepairsUniverse shows y'all how to repair your Motorola Moto M with this Official Motorola Moto G LCD & Touch Screen Assembly Repair Video. The DIY repair instructions we have provided will help you in replacing the brandish assembly (LCD & Bear upon Screen) on the Moto G. Exist sure to view our Moto G parts folio to larn about the diverse repair options we offer, all which volition assistance get your Motorola smartphone working, and looking, similar new once again! With our DIY Moto Thou tool kits and detailed teardown guides we can aid walk y'all through the complete repair procedure. If you exercise non feel comfortable doing the repair yourself- at that place is no need to worry. Contact i of our experienced repair technicians at 866-925-2350 and they will set up your device for y'all. Don't forget to subscribe to our YouTube Channel for additional DIY smartphone and tablet HD repair videos!
Recommended Tools:
- T5 Torx Screwdriver
- Safety Open Pry Tool
- Spudger Opening Tool
- Fine Betoken Tweezers
- Precision Knife Set
- Heat Gun or Pilus Dryer
Motorola Moto 1000 Display Assembly Repair Guide
Motorola Moto Grand ? Teardown Guide
RepairsUniverse shows you lot how to repair your Moto G with this Official Motorola Moto Grand Teardown Repair Guide. The piece of cake to follow instructions we have provided will show y'all how to teardown and disassemble your Motorola smartphone to supersede or repair a damaged display assembly or internal component. Visit RepairsUniverse.com to learn about the different repair options we offer, all which will aid get your Motorola device working similar new over again quickly, and affordably!

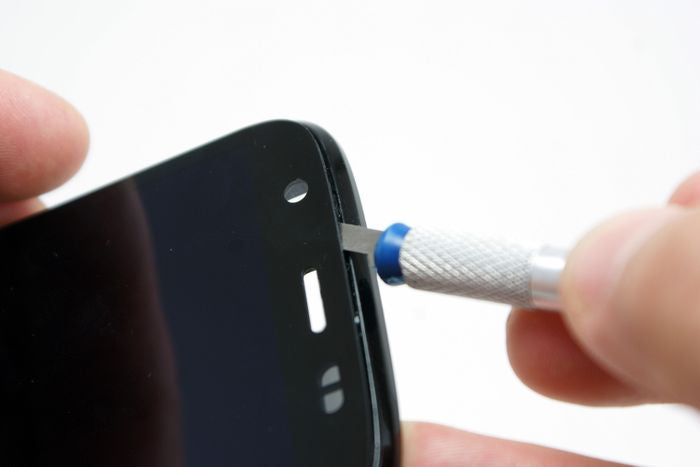
Back Encompass Removal
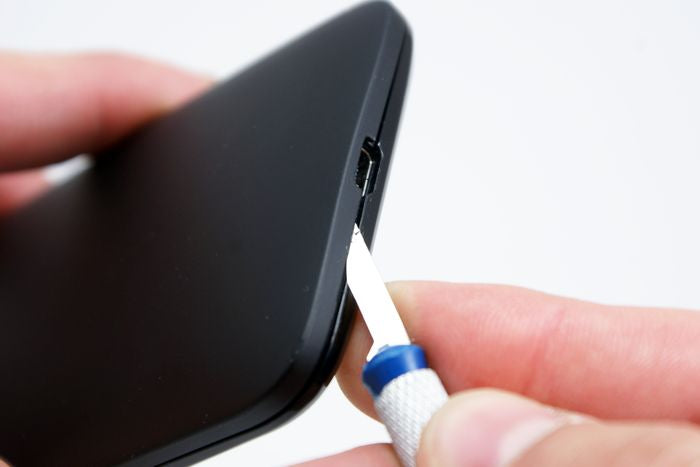
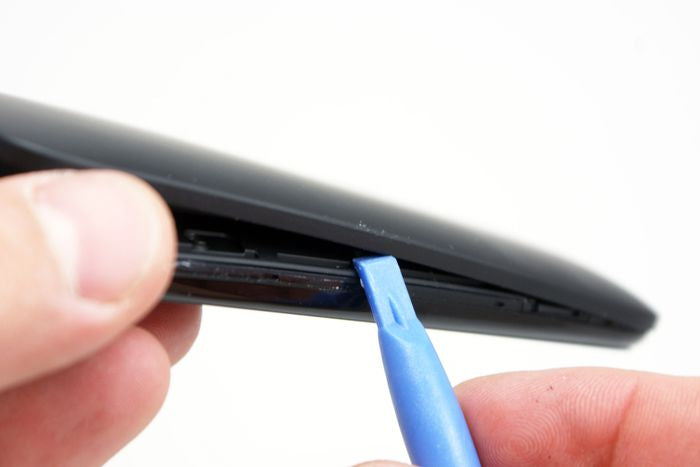
- Well-nigh the dock connector toward the bottom of the Moto G, insert the precision pocketknife in the seam between the front end housing/frame and rear example.
- This is a very tight seam so the use of the precision knife is advised as oppose to the plastic opening tool.

- Near the dock connector toward the bottom of the Moto Thou, insert the precision knife in the seam between the front housing/frame and rear case.

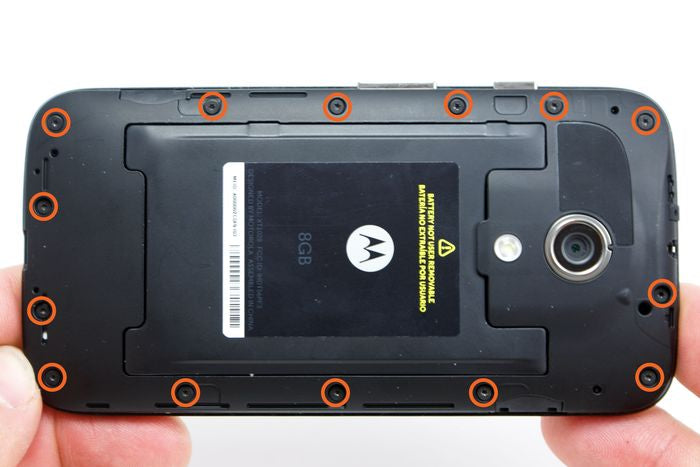
- Next, locate and remove the fourteen T5 torx screws that secure the protective embrace/rear housing to the front end housing/frame (marked with orange circles).
- You tin now remove the protective cover/rear housing from the Moto G (make sure to keep runway of the power & volume buttons).

Battery
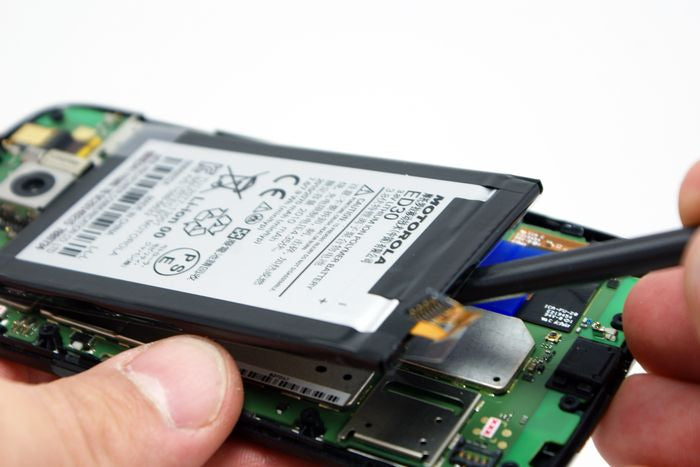
- Use the nylon spudger to gently pry up and disconnect the bombardment cable from the motherboard. With the flat side of the spudger carefully getunder the battery, lift it up from the securing adhesive and and then remove information technology from the Moto 1000.

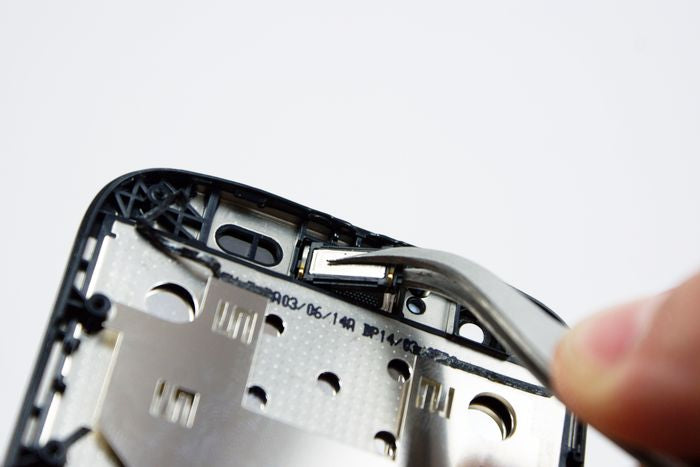
Front Facing Photographic camera

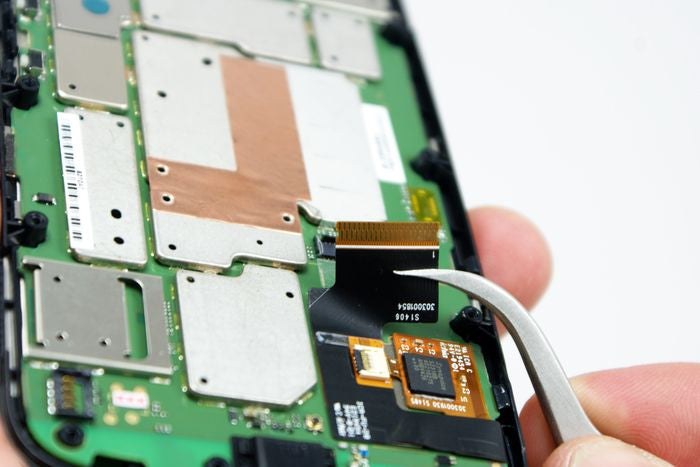
- The front-facing photographic camera should now exist loose and easy to lift out of the Moto G with the fine tip curved tweezers.

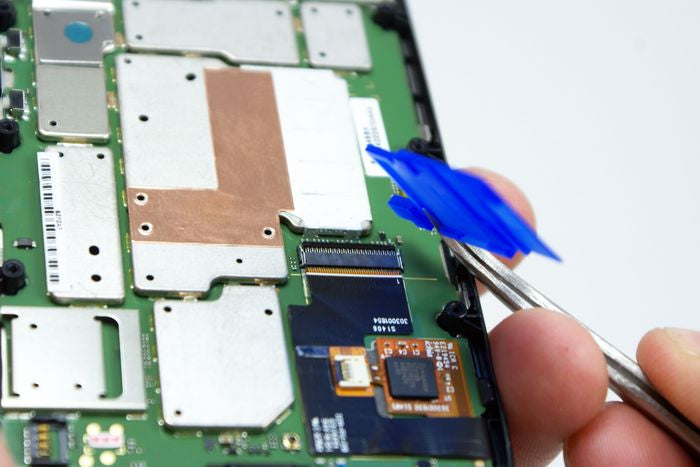
- Next, use the fine tip curved tweezers to lift the blue protective cover up and access the connection for the brandish assembly (LCD & bear upon screen).

- At present, locate the locking socket for the display associates ribbon cable. To release the cable, lift the contrary side of the locking socket xc degrees. You can now disconnect the ribbon cablevision.

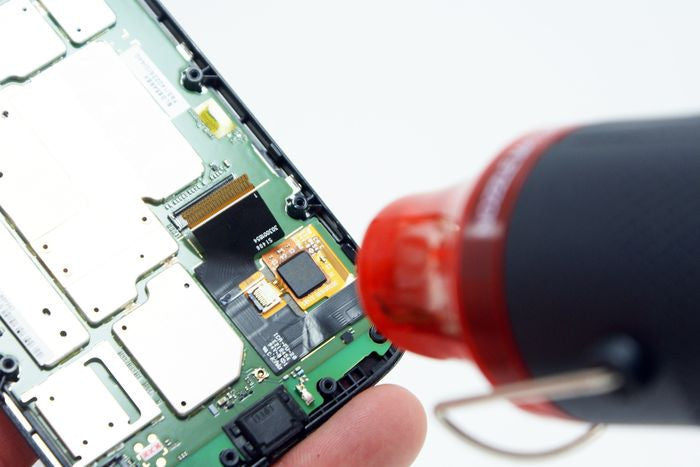
- The ribbon cable for the display assembly is secured to the motherboard with adhesive. Utilize the rut gun to soften the adhesive, making information technology easier to pry upwards the cable from the motherboard.

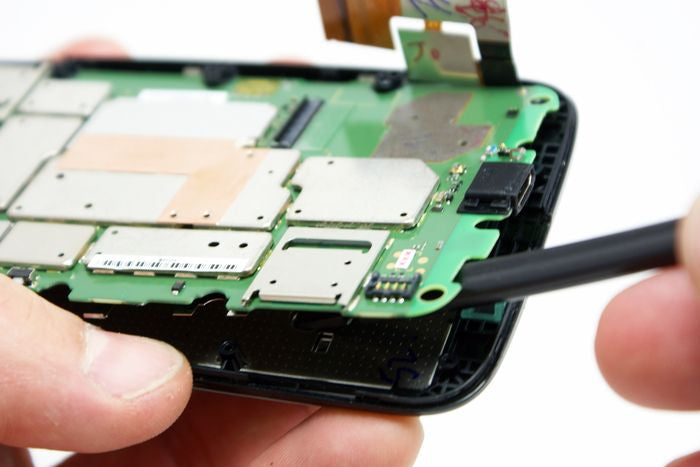
- Next, utilize the flat side of the nylon spudger to carefully remove the motherboard. Gently work the spudger between the motherboard and the display assembly/front housing to remove information technology from the Moto Thou.

Ear Piece Speaker
- The earpiece speaker is secured in its location with a small-scale amount of adhesive. Use your fine tip curved tweezers to easily remove it from the Motorola smartphone.

Brandish Assembly (LCD and Impact Screen)
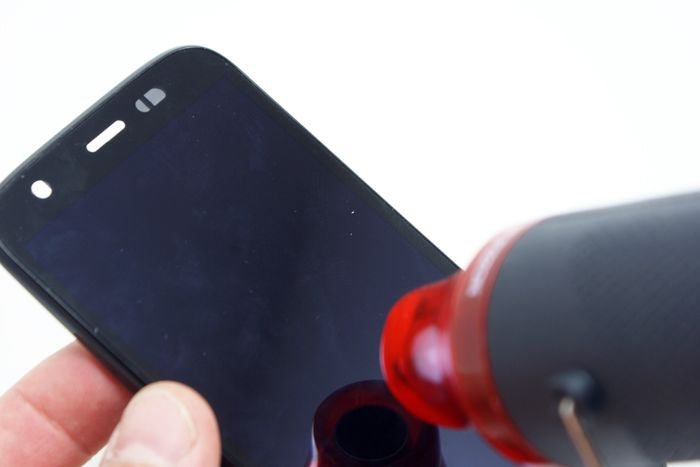
- At this time, the display assembly (LCD & touch screen) is fused together and cannot exist separated. It is secured to the front housing/frame of the smart phone with a generous amount of adhesive that will require heat andpatience to split.
- This procedure is only recommended on a Moto Grand with a damaged screen that requires replacement.
- Use the heat gun to brainstorm warming upwards the adhesive securing the LCD & touch screen digitizer assembly to the smartphone?s front housing/frame.

- To begin separation of the display assembly from the Moto G front housing/frame, securely grip the sides of the smartphone and slip the precision knife under the display assembly.

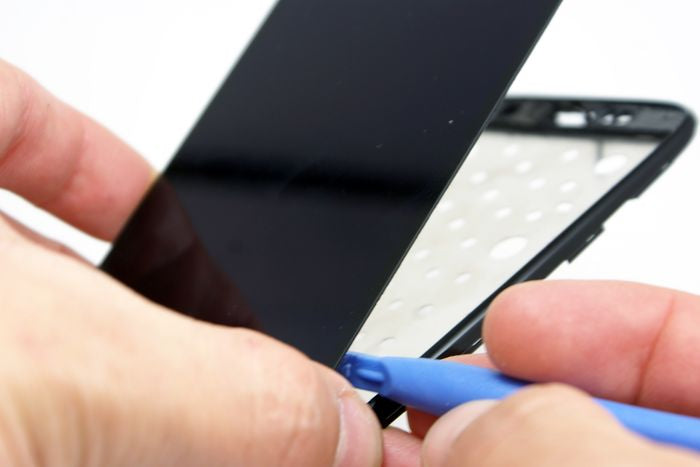
- Now, utilizing the plastic opening tool keep around the entire perimeter of the Moto G until the brandish associates is completely separated.
Detect/Alert:
RepairsUniverse does not accept any liability for damage, or injury caused, while you are following our disassemble guides. We make no representations, warranties, or conditions of whatsoever kind, limited or unsaid. Utilizing these guides to assist you in repairing your mobile devices will void your warranty. RepairsUniverse strictly prohibits altering or modifying our teardown guides for commercial use, reproduction, or publication
Source: https://www.repairsuniverse.com/blogs/repair-guides/motorola-moto-g-repair-guide
0 Response to "How To Open Moto G Power Back Cover"
Post a Comment